Farm Family Setup Guides


Step 7
Attach the two Base Metal Bars B at the bottom and in between Metal Frames L and R. Use Tool I to tighten four (4) Washers N and four (4) Screws H. Note: You may need to pull frames closer in order to fit the bars. Hand tighten all screws on Top A and Metal Frames L and R after you finish installing the Base Metal Bars B.

Step 10
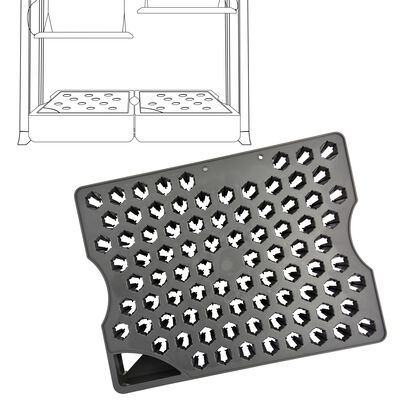
Place Water Bowls D over Base Metal Bars B and place Grow Deck E over each Water Bowl D (as shown above). Make sure the 2 cords (pump and water indicator) coming from inside Water Bowls D are properly positioned out of the back side in the Water Bowl notches. Make sure each Grow Deck E is sitting securely over the long pump nozzle.

Step 11
With the Control Box F facing toward you, connect thePower Cords coming from Metal Frame L to the left side of the Control Box F. Connect both the left pump and water indicator to the Left half of the Control Box. Repeat for the right. Once all cords are plugged in, let the Control Box F Position behind Water Bowl when done.

Step 13
(1) With the LED Light C facing down and Power Plug facing out towards the Metal Frame, remove rubber plugs from each top corner one at the time. (2) Insert one of the small metal endings from the Light hanging cords into the small opening. (3) Place the rubber plug back into its hole, holding hanging cord in place. (4) Repeat for all 4 holes. Repeat on the other LED Light C. Remember: Power plugs need to be facing out towards the closest Metal Frame.


Step 15
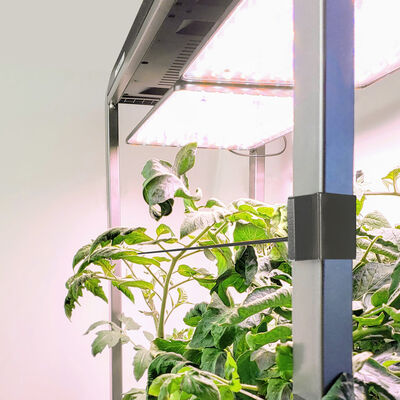
Optional Trellis Installation Instructions: The hooks of the long Trellis Support cords clip to the Metal Posts. Reach through and around the back Metal Posts and hook the clips from the outside in. Do the same with the other cord on the front. Then, hook the short Trellis Support cords on to and perpendicular to the long ones, at your desired spacing. TIP For plants that prefer crawling up, you may use your Trellis as a back wall, by attaching both long Trellis Support cords to the back Metal Frames on your Farm with the short Trellis Support cords as connectors in between.


Quick Plant
Planting Your Garden in 3 Steps
Once you have selected your Left or Right side garden from the Home Screen, touch the Quick Plant option on the control panel for step-by-step planting instructions. Quick Plant is the fastest and easiest path to staring a new garden. The pre-set Quick Plant option provides optimal growth based on the plant type you select. Follow the easy instructions on-screen. More detail is provided on the following pages.

Step 1
Add Water
- Add water to “Max Fill” indicator located under the Water Port.
- Use room temperature tap water or bottled distilled water. DO NOT USE WELL WATER which may interfere with your Plant Food, or softened water, as it contains levels of sodium usually harmful to plants.
- The 'Low Water' reminder alert will appear on the control panel when the water level is too low. For best results, keep the water level topped up to “Max Fill” at all times.

Step 2
Add Plant Food
- Plant Food instructions are printed on the packaging, as well as in the Seed Pod Kit Instructions booklet. Read and follow the instructions carefully!
- Use only the recommended amount of Liquid Plant Food.
- Add Plant Food directly into Bowl when first planting your Seed Pod Kit, and when the ‘Add Plant Food’ reminder activates (every 2 weeks).
- Do not overfeed! More isn’t better. Too much plant food can harm your plants.
Plant Food Feeding Tip: Always top off water level when adding Liquid Plant Food. For best results, top off the water level in your garden regularly.

Step 3
Add Add Seed Pods & Grow Domes
- Insert Seed Pods into openings in Grow Deck.
- Plants grow best and look best if medium or tall plants are in back openings, and short plants are in front openings (see diagram).
- Seed Pod Kits for Tomatoes and Peppers often include both Seed Pods and Plant Spacers. Plant Spacers allow your Tomato/Pepper plants ample room to grow. The correct amount of seeded pods are provided to maximize harvests.
- Place a Grow Dome over each Seed Pod. Leave Grow Domes on the Seed Pods until plants have sprouted and their leaves nearly touch the domes.


